

![]() Woodworker's Central
Woodworker's Central
![]() Woodworking Channel
Woodworking Channel
Sharpening the Stanley #80
Scraper Plane
9/1/98
Back in the olden days before 3M and Norton, before Klingspore wasn't a household name and Neanderthals ruled the Earth :), a woodworker was just as likely to smooth his or her wood with a scraper as use a sheet of paper covered with sand. Ahhh, those were the days. Instead of an off-white patina covering everything in a shop, little curls of wood lasagne would grace the floor and get caught between the treads of your Nikes.
Oddly, I'm a big fan of power tools and use them with reckfull abandon when I think they will save me some time. The roar of a planer is little distraction compared to it's alternative of hand-planing for days.
Believe it or not, I think scraping wood is also faster. When it comes time to remove the snipe from a costly piece of wood I grab my scraper. Whenever I have a scratch or ding in a veneer and sanding will be too slow or aggressive, I grab my scraper. Whenever I've flushed out an edgebanding but have a little more to remove, I grab my scraper. In fact, nearly every one of the journeymen and apprentices I've ever worked with have taken one look at my scraper and what it can do, then mysteriously have one just like it a few days later. Honest!
Of course, this doesn't mean scraping is right for you. It has some limitiations. Scraping soft woods is often an exercise in frustration - the edge tears instead of cuts. Scraping also doesn't make hardly any dust. If you've invested heavily in downdraft sanding tables, mega-belt sanders and can tell which grit is on your ROS blindfolded, scraping your wood will be akin to landing on another planet. Sorry...
But scraping, or the act of using a scraper is only part of the equation. The key to success isn't in the scraping technique compared to the talent required for sharpening. When we look back on our magazines and books, our eyes just glaze over when we try to transpose what we read to actual performance in the shop. No matter how hard we try, learning to sharpen a scraper just doesn't gel until we SEE someone do it. Then it all makes sense.
This is the theme behind our first offering
to the Woodworking Channel. 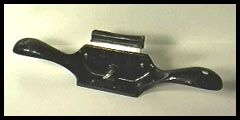 The tool of choice isn't
your basic flat, steel rectangle but the Stanley #80 scraper
plane. When I first saw this winged wonder at my local hardware
store, I thought I was buying a spokeshave - I was younger then...:)
They don't carry them anymore, nor do newcomers Home Depot or
Wye River (hint, hint) but you can find one at Woodcraft or Highland
Hardware. For me it's a bargain at any price.
The differences between the #80 and regular scrapers are many. Regular scrapers can be pulled as well as pushed, their depth of cut can be easily adjusted by curving your grip and they will, unfortunately, follow dips or soft spots in the grain. The #80 doesn't follow dips but knocks off high spots and it's curvature is adjusted via the thumbscrew you see near the center of the base. A slight twist takes a fine shaving. Really cranking it removes a thick ribbon of wood regarless of the grain direction. Some say you can do the same with a finely-tuned hand plane. I don't know, I can never get my planes to cooperate but sharpening the #80 is easy.
 The blade of the #80
also differs with regular scrapers in that it's filed at an angle
instead of straight across. Regular scrapers, with their square
edges, allow you to draw a burr on both corners of an edge. Drawing
these burrs, however are a little more time consuming - with
the #80 and it's angled edge, half the work is already done for
you.
It's also typical to sharpen both edges at one time and hiding the backup edge under it's protective cover. (Photo Right) This cover is a must as it protects you as much as the blade. Though I usually rest my #80 upside down, having such a tool with it's razor-sharp edge sticking out can be a great way to meet your local ER surgeon. Watch out!
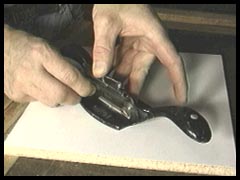 Pictured at right and
above is the leading view of the scraper and the bar which holds
the blade in place. During installation, the two clamp screws
are hand tightened (screwdriver optional) and the pressure to
keep the blade from slipping is applied by the thumb screw from
behind. I only use the screwdriver to tighten the clamp screws
after the blade slips for some reason or other. The rest of the
time I don't bother and it usually works fine.
Installing the blade parallel to the sole is easy: make sure the sole is clean and set it on a flat surface. Slip the unguarded edge behind the clamp bar and with one hand, hold the scraper body and blade down while you tighten the clamp screws. Swapping a dull edge for a sharp one takes all of ten seconds if all you have to do is turn the blade around. Putting that razor burr on the edge takes a bit longer. Did you pop some popcorn and find a seat in the front row? :-)
|
Filing I try to file as evenly as possible and I'll sometimes check the edge with something I know is straight. A couple swipes usually does it; then I'll knock the corners off to prevent the blade ends from gouging while in use. We don't want to cause any more problems than we're curing. |
To Hone or Not to Hone
Once the blade is filed, you have two choices: either take the
blade onward to burnishing or hone the blade first. Honing results
in the smoothest cut but if you are planning to sand anyway,
it's optional. If you don't hone the blade, the drawn burr will
be nicked and jagged but it will still work like having badly
worn jointer knives. The edge isn't as durable either so lets
hone this puppy.
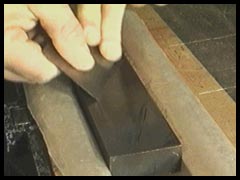 Honing is pretty straight
forward and those who can do a nice plane blade will have no
problems. If you vacillate between water and oil stones, you
might pick a nice oil stone for this operation. Some water stones
might be too soft for the scraper's thin steel leading to gouging
the stone and/or catching an edge. You'll also need to use oil
for the next step so avoiding greasy fingers is impossible...sorry.
BTW, I get a nice polish from a fine India using light mineral oil as a lubricant. Standard honing technique applies so we won't get into it here. When you're done, the edge and back should be burr-free, smooth and ready for burnishing.
Burnishing
The key to drawing a fine edge and turning it over to form a
hook is in the burnishing. As far as I can tell there are five
different types of burnishers you might use. The first is one
of those automatic burnishers with a wheel or some odd thing
to draw the edge. Never tried one so I can't even tell you how
they might work on the #80's angled edge.
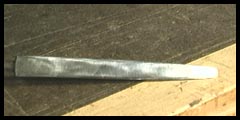 Choices two three or
four are round, oval and triangle burnishers. These are handled
lengths of steel harder than the steel in the scraper blade and
when you run them along the edge, they compress the scraper's
steel forming it into the required shape.
All things considered, it really doesn't
matter which type you try as each will work. A round burnisher
focuses the force onto a smaller area thus making it the faster
of the three. You also can force too much and unevenly cause
the edge to scallop. Smooth and light works best for the #80's
already angled scraper blade.
I use a triangle burnisher with only one face polished. It's
slightly convex and seems to allow pretty agressive burnishing
if that's desired. Triangle burnishers only work on straight
blades. Look for a round burnisher when drawing a burr on a curved
scraper.
The last category of burnisher is nearly anything hard laying around: screwdrivers, chisels, gouges, drill bits, etc. For me they have all doubled for burnishers at one time or another with varying degrees of success. Experimenting might find the ideal burnisher already in your toolbox.
| Drawing the Edge The first step in forming a razor-sharp hook on the edge of your blade is drawing the edge. Lay the blade bevel-side down overhanging the edge of your workbench and hold it securely with your other hand. Apply a drop of oil along the edge and then stroke the burnisher back and forth to draw the burr. The angle of the burnisher can be anything between 2 and 5 degrees off horizontal and I usually do about 20-30 strokes to get the burr wide enough for efficient cutting. |
It's not necessary to stop burnishing at any given point. If you aren't drawing the steel outward enough, a few more strokes might be needed. You can drag your finger from blade flat across the bevel to feel if you have drawn the burr correctly. The burr will have hooked backward across the bevel.
 I've found it best to
stop earlier rather than later as too much drawing can make the
burr too thin and fragile. If you haven't drawn it enough, made
painfully obvious with your first cut, it's simple to yank the
blade out and redraw the burr. Without doubt this is the step
which takes the most trial and error; it helps to develop a feel
for the process. Practice, practice, practice! :)
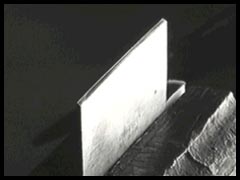
If everything has gone OK, popping the blade back in the vise should reveal the following view. In the picture at right, the hook is turned back towards the bevel as evidenced by a thin reflection of light at the blade's point.
|
Turning the Hook In the vise with edge up, wipe a fresh drop of oil onto the bevel. Set the burnisher firmly down at one end a few degrees towards horizontal from the bevel. Draw one hard stroke along the full length of the blade. When finished, you can pull your finger across the edge and feel the burr on the other side. Wipe the oil off and reinstall the blade, making sure the hook is angled towards the nose of the plane...:) |
|
And how does it work? The video clip at right demonstrates scraping at it's best. The wood is a crotch piece of red oak resawn from the firewood pile. It is extremely dense and the grain goes every direction. Although you might want to sand it a little, 150 grit or finer, it really isn't necessary if the blade is sharpened correctly. The harder the wood, the smoother the finish. |
|
Re-Sharpening If your first attempts at scraper sharpening aren't that successful, don't get discouraged. It will get better the more you try it. Jim Mattson |